

This tutorial takes advantage of one of the new features avalable in Paint Shop Pro 6.x, Picture Frames(they can be found in your "Image" menu). This tutoral is graphics-intensive, so it can take a little time to load if you have a slow modem.
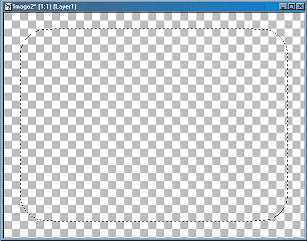
1) Open new image: 600x400, 16 million colours, transparent background.
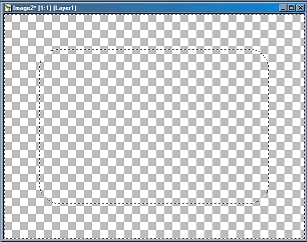
2) Use the selection tool with feather set to 15(the shape of the selection does not matter; I used Rounded Rectangle for this tutorial) to select an area from 50,50 to 550,400.
3) Invert(Selections -> Invert) your selection.
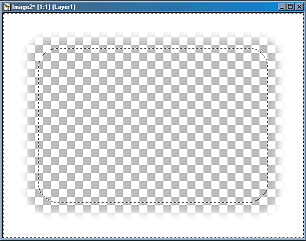
4) Flood-fill the selected area with colour, gradient, or pattern of your choice(I used solid white).
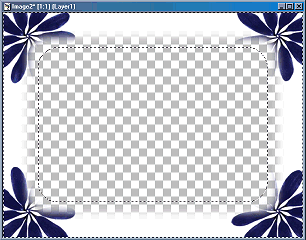
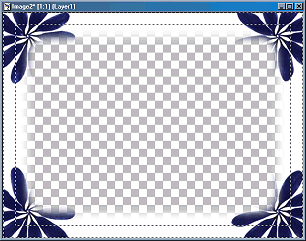
5) Add any other decorations you want on the frame(this tutorial used a tube I made from the cover of a CD-single I own).
6) De-select(Selections -> Select None) the selected area.
7) Double-click on the selections tool. On the window that pops up, set it to these properties:
8) Invert your selection.
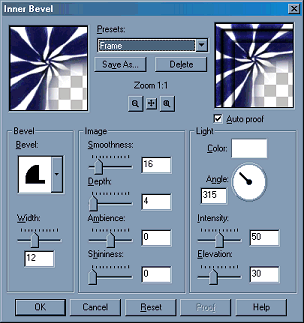
9) Go to Image -> Effects -> Inner Bevel. Use one of the presets(I used "Frame"), or tweak with the settings to your preference. Click OK.
10)Deselect the selected area. Now all you need to do is save your frame as a .pfr file to your "Frames" folder(see bottom of page to learn how to save your frame as a .pfr file)!
Here's an example of a finished project:
When applying these picture frames to your images, you need to need to frame the inside of your image for this frame to work right, unless you have a solid-colour background in your picture. In that case, you can set the background colour in PSP to the background colour of your image and apply the frame to the outside of your image.
-----
To save files as .pfr:
1) Go to File -> Preferences -> File Format Associations.
2) Select the Paint Shop Pro format and click "Add".
3) In the little text area, add "pfr"(Without the quotes, of course) to the list. Click OK. This will associate .pfr files to the Paint Shop Pro format.
4) When you save your .pfr file, select the Paint Shop Pro format, enter the name of your file, and at the end, type ".pfr"(again, without the quotes).
And there you have it: Your own custom Picture Frame Files for Paint Shop Pro 6.x!

Note: If you want to, you can also use Blade Pro or Eye Candy at this point.

All images and HTML are ©2000 crystalline. I don't see any reason why you would need to use these graphics, but if you do, please ask me. Images were created entirely in Paint Shop Pro 6.01.
"I survived Y2K, and all I got was this lousy quote!" -Me:)